


Industry news


How to Create a Wax Mold for Investment Casting
Wax molds play a crucial role in investment casting. They serve as the foundation for creating precise and intricate metal parts. You need to understand the step-by-step process to ensure successful mold creation. This knowledge helps you achieve high-quality results and reduces errors. By mastering the techniques involved, you can produce molds that meet exact specifications. This understanding not only enhances your skills but also contributes to efficient and cost-effective casting operations.
Key Takeaways
- Start with a precise wax pattern: Choose the right type of wax based on your project needs, considering factors like melting point and shrinkage rate.
- Design with care: Use tools like CAD software and carving tools to create detailed and accurate wax patterns that meet specifications.
- Assemble patterns effectively: Ensure proper alignment and stability by using techniques like wax welding and adding support structures.
- Build a strong mold shell: Apply ceramic slurry evenly and layer it properly to create a durable shell that can withstand The Casting Process.
- Dewax carefully: Choose a suitable method for removing wax, such as steam autoclave or flash fire, to maintain the integrity of the mold.
- Inspect thoroughly: Check for defects in the mold after dewaxing, addressing any cracks or irregularities to ensure high-quality casting.
- Practice and refine your skills: Regular practice and attention to detail at each step will enhance your ability to produce intricate and precise castings.
Preparing the Wax Pattern
Creating a wax pattern is a crucial step in Investment Casting. This pattern serves as the model for your final cast product. You must pay attention to detail and precision during this stage to ensure the success of the entire casting process.
Selecting the Right Wax
Choosing the appropriate wax is vital for creating a high-quality wax pattern. Different types of wax offer various properties that can affect the outcome of your investment casting.
Types of Wax for Investment Casting
- Pattern Wax: This type is commonly used due to its excellent dimensional stability and smooth surface finish. It is ideal for intricate designs.
- Filled Pattern Wax: This wax contains fillers that enhance its strength and reduce shrinkage, making it suitable for larger patterns.
- Emulsified Wax: Known for its flexibility, this wax is often used for complex shapes that require bending or twisting.
Factors to Consider When Choosing Wax
When selecting wax, consider the following factors:
- Melting Point: Choose a wax with a melting point that suits your working environment and equipment.
- Shrinkage Rate: Opt for a wax with minimal shrinkage to maintain the accuracy of your pattern.
- Surface Finish: Ensure the wax provides a smooth finish to reduce post-casting machining.
- Reusability: Some waxes can be reclaimed and reused, which can be cost-effective.
Designing the Wax Pattern
Designing the wax pattern requires careful planning and execution. The design directly influences the quality and precision of the final cast product.
Tools and Techniques for Wax Pattern Design
To design an effective wax pattern, you will need:
- Wax Injection Molding Machine: This machine helps create precise patterns by injecting molten wax into a mold.
- Carving Tools: Use these tools for fine detailing and adjustments on the wax pattern.
- CAD Software: Computer-aided design software assists in creating detailed and accurate pattern designs.
Common Design Considerations
When designing your wax pattern, keep these considerations in mind:
- Complexity: Ensure the design is as simple as possible while meeting the required specifications.
- Draft Angles: Incorporate draft angles to facilitate easy removal of the pattern from the mold.
- Dimensional Accuracy: Pay attention to dimensions to ensure the final cast part meets the desired specifications.
- Support Structures: Include necessary support structures to maintain the integrity of the pattern during handling and assembly.
By carefully selecting the right wax and designing the pattern with precision, you set the foundation for successful investment casting. These steps are essential for achieving high-quality results and minimizing errors in the casting process.
Assembling and Mounting the Wax Patterns
Assembling and mounting wax patterns is a critical phase in the investment casting process. This stage ensures that your patterns are stable and ready for the next steps. Proper assembly and mounting lead to precise and high-quality castings.
Assembling Multiple Patterns
When working with multiple wax patterns, you need to join them effectively. This step is essential for creating complex structures or larger castings.
Techniques for Joining Wax Patterns
- Wax Welding: Use a heated tool to melt and fuse the edges of the wax patterns. This method provides a strong bond.
- Adhesive Application: Apply a specialized wax adhesive to join patterns. This technique is useful for intricate designs.
- Mechanical Fastening: Employ pins or clips to hold patterns together temporarily. This approach helps maintain alignment during assembly.
Ensuring Stability and Precision
Stability and precision are crucial when assembling wax patterns. Follow these tips to achieve both:
- Alignment: Ensure all patterns align correctly. Misalignment can lead to defects in the final casting.
- Support Structures: Add supports to prevent sagging or distortion. These structures maintain the integrity of the assembly.
- Inspection: Regularly inspect the assembly for gaps or weak points. Address any issues immediately to avoid complications later.
Mounting on a Sprue
Mounting wax patterns on a sprue is the next step. The sprue acts as a channel for molten metal during casting.
Importance of Proper Mounting
Proper mounting on a sprue is vital for several reasons:
- Metal Flow: Ensures smooth flow of molten metal into the mold.
- Air Venting: Allows air to escape, preventing air pockets in the casting.
- Structural Support: Provides stability to the entire assembly during the casting process.
Tips for Effective Mounting
To mount wax patterns effectively, consider these tips:
- Sprue Size: Choose a sprue size that matches the volume of metal required. A too-small sprue can restrict metal flow.
- Attachment Points: Securely attach patterns to the sprue at multiple points. This prevents movement during casting.
- Balance: Distribute patterns evenly around the sprue. Balanced mounting reduces stress and potential defects.
By mastering the techniques of assembling and mounting wax patterns, you enhance the quality and precision of your investment casting projects. These steps are fundamental to achieving successful outcomes and minimizing errors.
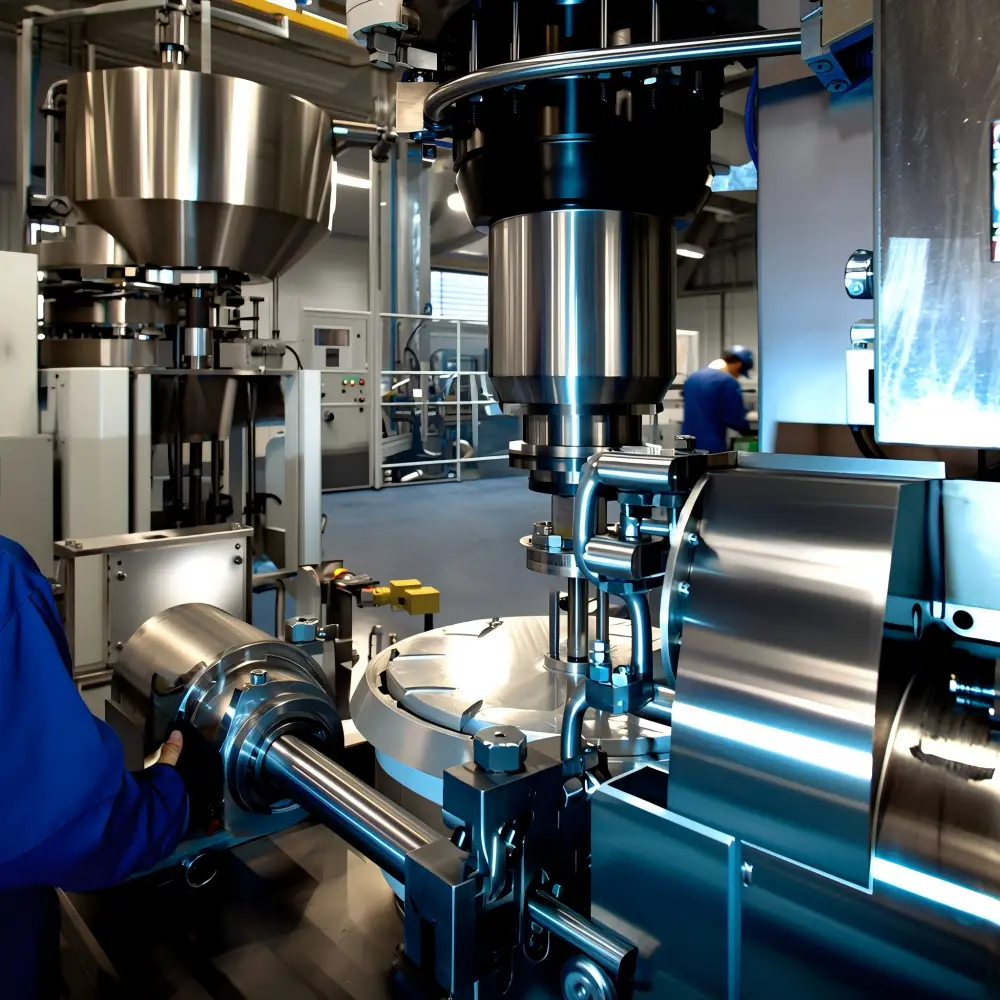
Creating the Mold Shell
Creating the mold shell is a pivotal step in investment casting. This shell forms the cavity where molten metal will be poured, shaping your final product. You must ensure the shell is strong and precise to achieve high-quality results.
Applying the Ceramic Slurry
Applying ceramic slurry to the wax pattern is the first step in creating the mold shell. This process requires attention to detail to ensure a smooth and even coating.
Steps for Coating the Wax Pattern
- Prepare the Slurry: Mix the ceramic slurry according to the manufacturer's instructions. Ensure the mixture is smooth and free of lumps.
- Dip the Wax Pattern: Submerge the wax pattern into the slurry. Make sure the entire surface is covered.
- Drain Excess Slurry: Allow excess slurry to drip off the pattern. This step prevents uneven thickness.
- Apply Sand: Sprinkle fine sand over the wet slurry. This layer adds strength and texture to the shell.
- Dry the Coated Pattern: Let the coated pattern dry completely. This step is crucial for building a strong shell.
Ensuring Even Coverage
Even coverage is essential for a successful mold shell. Follow these tips to achieve it:
- Rotate the Pattern: Rotate the wax pattern while dipping to ensure all areas receive an even coat.
- Monitor Slurry Consistency: Regularly check the slurry's consistency. Adjust as needed to maintain uniform coverage.
- Inspect the Coating: After drying, inspect the coating for thin spots or gaps. Reapply slurry if necessary.
Building Up the Shell
Building up the shell involves adding multiple layers to achieve the desired thickness and strength. This process ensures the shell can withstand the casting process.
Layering Techniques
- Repeat Dipping: Dip the pattern in slurry multiple times. Each dip adds a new layer to the shell.
- Alternate Sand Sizes: Use different sand sizes for each layer. This technique enhances the shell's strength and stability.
- Allow Drying Between Layers: Let each layer dry completely before applying the next. This step prevents cracking and ensures a solid shell.
Drying and Curing the Shell
Proper drying and curing are vital for a durable mold shell. Follow these guidelines:
- Controlled Environment: Dry the shell in a controlled environment. Maintain consistent temperature and humidity levels.
- Curing Time: Allow sufficient curing time for the shell to harden fully. This step ensures it can withstand the heat and pressure of casting.
- Final Inspection: Inspect the shell for defects or weak spots. Address any issues before proceeding to the next stage.
By carefully applying the ceramic slurry and building up the shell, you create a robust mold for investment casting. These steps are crucial for achieving precise and high-quality castings.
Removing the Wax
Removing the wax from the mold is a crucial step in preparing for the casting process. This stage ensures that the mold is ready to receive molten metal, forming the final product with precision and accuracy.
Dewaxing Process
The dewaxing process involves eliminating the wax pattern from the ceramic shell. You must execute this step carefully to maintain the integrity of the mold.
Methods for Removing Wax
- Steam Autoclave: Use steam to melt and remove the wax. This method is efficient and preserves the mold's strength.
- Flash Fire: Apply a quick burst of high heat to burn out the wax. This technique is fast but requires careful control to avoid damaging the mold.
- Microwave Dewaxing: Employ microwave energy to heat and remove the wax. This method offers precise control over the dewaxing process.
Safety Considerations
Safety is paramount during the dewaxing process. Follow these guidelines to ensure a safe environment:
- Protective Gear: Wear gloves, goggles, and protective clothing to shield yourself from heat and wax splatters.
- Ventilation: Ensure proper ventilation in the workspace to disperse fumes and prevent inhalation.
- Equipment Maintenance: Regularly inspect and maintain dewaxing equipment to prevent malfunctions and accidents.
Inspecting the Mold
After removing the wax, inspect the mold thoroughly. This step is essential to identify any defects and prepare the mold for casting.
Checking for Defects
Examine the mold for any imperfections that could affect the casting quality:
- Cracks: Look for cracks or fractures in the ceramic shell. These can lead to leaks during casting.
- Thin Spots: Identify areas where the shell may be too thin. Reinforce these spots to prevent breakage.
- Surface Irregularities: Check for bumps or rough patches that could transfer to the final cast product.
Preparing for Casting
Once you confirm the mold's integrity, prepare it for the casting process:
- Clean the Mold: Remove any debris or residue from the mold's interior. A clean mold ensures a smooth casting surface.
- Preheat the Mold: Gradually heat the mold to the required temperature. Preheating helps prevent thermal shock during casting.
- Secure the Mold: Ensure the mold is stable and properly positioned for the casting process. Stability prevents movement and potential defects.
By effectively removing the wax and inspecting the mold, you set the stage for a successful casting operation. These steps are vital for achieving high-quality results and minimizing errors in the investment casting process.
Creating a wax mold involves several essential steps. You start by preparing the wax pattern, ensuring precision and detail. Next, assemble and mount the patterns with care to maintain stability. Building the mold shell requires applying ceramic slurry and layering for strength. Finally, remove the wax and inspect the mold for defects. Focus on these key considerations to achieve high-quality results. Practice and refine your techniques to improve your skills. By mastering these steps, you enhance your ability to produce precise and intricate castings.
FAQ
What is investment casting?
Investment casting, also known as lost-wax casting, is a manufacturing process that involves creating a wax pattern, coating it with a ceramic shell, and then melting the wax away to form a mold. You pour molten metal into this mold to create intricate and precise metal parts.
Why is wax used in investment casting?
Wax is used because it can be easily shaped into detailed patterns. It provides a smooth surface finish, which translates to the final cast product. Additionally, wax can be melted and removed without damaging the ceramic mold, making it ideal for this process.
How do you choose the right wax for your project?
Consider factors like melting point, shrinkage rate, surface finish, and reusability. Different types of wax, such as pattern wax, filled pattern wax, and emulsified wax, offer various properties. Choose based on your specific needs and the complexity of your design.
What tools do you need for designing a wax pattern?
You will need a wax injection molding machine for creating precise patterns, carving tools for detailing, and CAD software for designing accurate patterns. These tools help you achieve the desired shape and detail in your wax pattern.
How do you ensure stability when assembling wax patterns?
Ensure proper alignment of all patterns. Use support structures to prevent sagging or distortion. Regularly inspect the assembly for gaps or weak points and address any issues immediately to maintain stability and precision.
Why is proper mounting on a sprue important?
Proper mounting ensures smooth metal flow, allows air venting to prevent air pockets, and provides structural support during casting. It is crucial for achieving high-quality results and minimizing defects in the final product.
What are the steps for applying ceramic slurry to a wax pattern?
- Prepare the slurry according to instructions.
- Dip the wax pattern to cover it completely.
- Drain excess slurry to prevent uneven thickness.
- Apply sand for added strength.
- Dry the coated pattern thoroughly.
How do you remove wax from the mold?
Use methods like steam autoclave, flash fire, or microwave dewaxing. Each method has its advantages, but you must execute them carefully to maintain the mold's integrity and ensure safety.
What should you check for when inspecting the mold?
Look for cracks, thin spots, and surface irregularities. These defects can affect casting quality. Address any issues before proceeding to ensure a smooth and successful casting process.
How can you improve your investment casting skills?
Practice regularly and refine your techniques. Pay attention to detail at each step, from wax pattern creation to mold inspection. By mastering these processes, you enhance your ability to produce precise and intricate castings.