


Industry news


How Investment Casting Works Step by Step
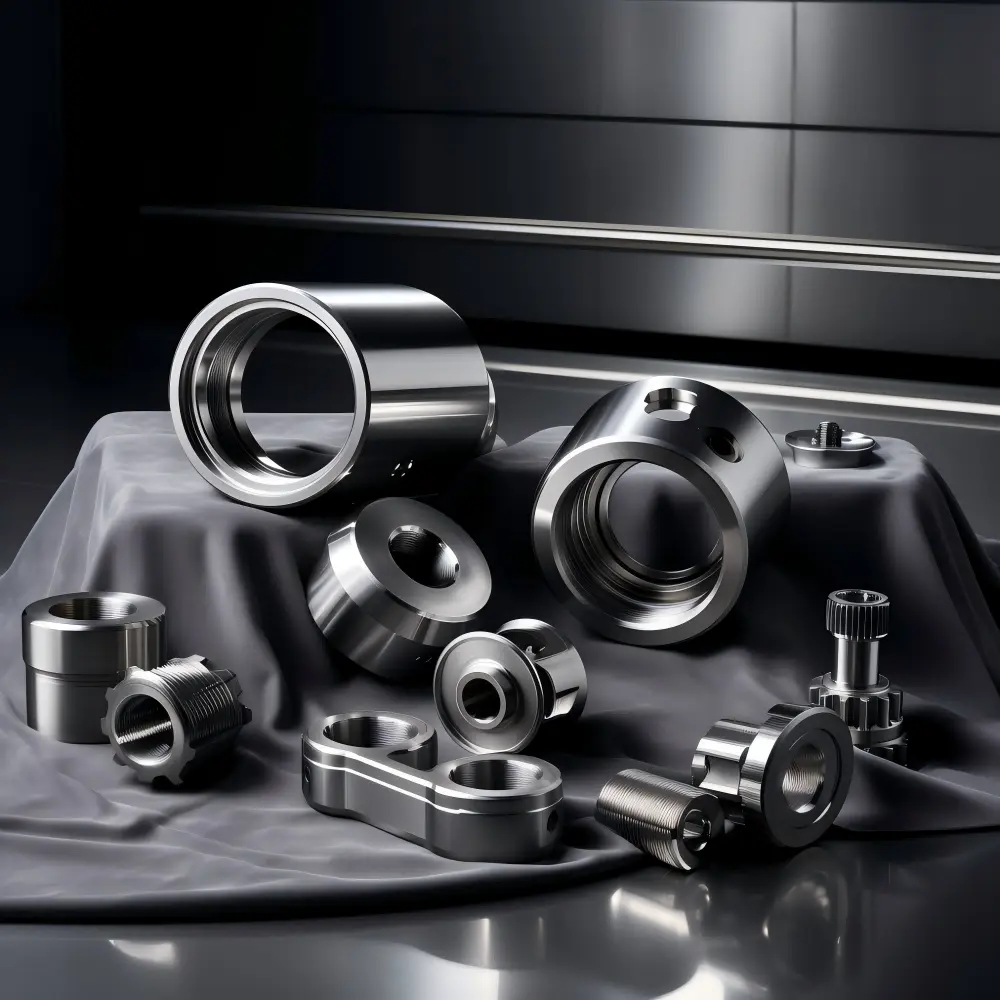
Investment casting, often called lost-wax casting, allows you to create intricate and precise metal parts. This process starts with a wax model that mirrors the final product. You then coat this model with a ceramic material to form a durable mold. Once the wax is removed, molten metal fills the cavity, capturing every detail. This method ensures exceptional accuracy and is ideal for producing complex components. Its ability to deliver high-quality results makes it a preferred choice in industries like aerospace and medical manufacturing.
Key Takeaways
- Investment Casting, or lost-wax casting, is a precise method for creating intricate metal parts, ideal for industries like aerospace and medical manufacturing.
- The process begins with creating high-quality wax-injection tooling, which is crucial for producing accurate wax patterns that define the final product's shape.
- Assembling wax patterns into a 'wax tree' optimizes efficiency by allowing multiple parts to be cast simultaneously, reducing material waste and production time.
- The investment shell, made from ceramic material, is essential for capturing the details of the wax patterns and must be built up in layers for strength.
- Dewaxing removes the wax patterns from the ceramic shell, creating a cavity for molten metal, and must be done carefully to maintain the integrity of the mold.
- Pre-heating the mold is critical to prevent thermal shock and ensure smooth metal flow, which is vital for achieving high-Quality Castings.
- Final steps include cleaning, inspecting, and finishing the castings to ensure they meet quality standards before delivery, reinforcing the reliability of the investment Casting Process.
Step 1: Manufacture the Wax-Injection Tooling
Creating wax-injection tooling is the first step in the investment casting process. This tooling serves as the foundation for producing accurate wax patterns, which are essential for achieving precise metal parts.
Purpose of Wax-Injection Tooling
Wax-injection tooling allows you to create detailed and consistent wax patterns. These patterns replicate the exact shape of the final product. By using this tooling, you ensure that every wax pattern maintains uniformity, which directly impacts the quality of the casted parts. Without proper tooling, achieving the intricate details required in investment casting becomes challenging.
How the Tooling is Created
You begin by designing the tooling based on the specifications of the desired part. Engineers use advanced software to create a 3D model of the tooling. Once the design is finalized, the tooling is manufactured using durable materials like aluminum or steel. These materials withstand repeated use during the wax injection process. Precision machining techniques ensure that the tooling captures every detail of the design, enabling the production of flawless wax patterns.
Importance of Tooling in Investment Casting
The tooling plays a critical role in the success of investment casting. It determines the accuracy and consistency of the wax patterns, which directly affect the final metal parts. High-quality tooling minimizes defects and reduces material waste. It also ensures that the casting process runs efficiently, saving time and resources. By investing in well-designed tooling, you set the stage for producing complex and reliable components.
Step 2: Produce Wax Patterns
Creating wax patterns is a crucial step in the investment casting process. These patterns serve as the exact replicas of the final metal parts, ensuring precision and consistency throughout the manufacturing process.
How Wax Patterns Are Made
You start by injecting molten wax into the wax-injection tooling. The tooling molds the wax into the desired shape, capturing every intricate detail of the design. Once the wax cools and solidifies, you carefully remove the pattern from the tooling. To maintain accuracy, you inspect each wax pattern for defects or imperfections. Any flaws at this stage can affect the quality of the final product, so attention to detail is essential.
Role of Wax Patterns in the Process
Wax patterns act as the foundation for the entire investment casting process. They define the shape and dimensions of the final metal part. By using these patterns, you ensure that the ceramic mold accurately reflects the design specifications. Wax patterns also allow you to create complex geometries and fine details that would be difficult to achieve with other manufacturing methods. Without precise wax patterns, the process cannot deliver the high-quality results that investment casting is known for.
Ensuring Precision in Wax Patterns
To achieve precision, you must control every aspect of the wax pattern production. Use high-quality wax materials to ensure stability and consistency. Maintain the tooling at the correct temperature to prevent defects during the injection process. Regularly inspect and calibrate the tooling to avoid dimensional inaccuracies. By following these practices, you can produce wax patterns that meet the exacting standards required for investment casting.
Step 3: Assemble Wax Patterns to Form a Tree
What is a Wax Tree?
A wax tree is a structure that combines multiple wax patterns into a single assembly. This configuration resembles the branches of a tree, with each wax pattern acting as a "branch" connected to a central "trunk." The trunk serves as the main channel for molten metal during the casting process. By grouping wax patterns into a tree, you streamline the production of multiple parts in one casting cycle.
The wax tree is essential for optimizing efficiency and reducing material waste in investment casting.
How Wax Patterns Are Assembled
To create a wax tree, you start by attaching individual wax patterns to a central wax sprue. The sprue acts as the trunk, while the patterns form the branches. You use heated tools or adhesives to securely bond the patterns to the sprue. Each connection must be precise to ensure proper alignment and stability. Once assembled, the tree undergoes inspection to confirm that all patterns are correctly positioned and free of defects.
Follow these steps for assembly:
- Prepare the wax sprue: Ensure it is clean and free of imperfections.
- Attach wax patterns: Use heat or adhesive to connect each pattern to the sprue.
- Inspect the tree: Check for alignment, stability, and any visible flaws.
This process requires attention to detail to maintain the integrity of the tree during subsequent steps.
Benefits of the Tree Structure
The wax tree offers several advantages that enhance the investment casting process:
- Efficiency: Casting multiple parts simultaneously reduces production time and costs.
- Material conservation: The tree design minimizes waste by optimizing the use of wax and metal.
- Uniformity: Grouping patterns ensures consistent quality across all parts in the assembly.
- Simplified handling: A single tree is easier to manage than individual patterns during coating and casting.
By assembling wax patterns into a tree, you improve productivity and ensure high-quality results. This step lays the groundwork for the next stages of investment casting, where precision and efficiency are critical.
Step 4: Produce the Investment Shell
Creating the investment shell is a critical step in the investment casting process. This shell forms the mold that holds the molten metal, ensuring the final product captures every intricate detail of the wax patterns.
Coating the Wax Tree with Ceramic Material
You begin by coating the wax tree with a liquid ceramic slurry. This slurry contains fine ceramic particles suspended in a liquid binder. Dip the entire wax tree into the slurry, ensuring every surface gets an even coat. After dipping, sprinkle fine sand or refractory material over the wet surface. This step enhances the shell's texture and prepares it for additional layers. Allow the coating to dry completely before proceeding to the next layer.
The first layer, often called the "prime coat," is the most important. It directly contacts the wax patterns and determines the surface quality of the final casting.
Building Layers for Strength
To strengthen the shell, you repeat the coating process multiple times. Each layer involves dipping the wax tree into the ceramic slurry and applying a coarser refractory material. With each repetition, the shell becomes thicker and more durable. Typically, you build five to ten layers, depending on the size and complexity of the casting. Dry each layer thoroughly before adding the next to prevent defects. This layering process ensures the shell can withstand the high temperatures and pressures of molten metal.
Importance of the Ceramic Shell
The ceramic shell plays a vital role in the success of investment casting. It provides a precise mold that captures the intricate details of the wax patterns. Its strength and heat resistance allow it to hold molten metal without breaking or deforming. A well-constructed shell minimizes the risk of defects, ensuring the final casting meets quality standards. By focusing on this step, you set the foundation for producing accurate and reliable metal parts.
Step 5: Dewax the Mold
What is Dewaxing?
Dewaxing is the process of removing the wax patterns from the ceramic shell. This step creates the hollow cavity inside the mold, which will later hold the molten metal. The wax patterns, which served as the foundation for the mold, are no longer needed at this stage. By eliminating the wax, you prepare the mold for the casting process. Dewaxing ensures that the ceramic shell remains intact and ready to capture the intricate details of the final product.
Dewaxing is a crucial step that transitions the mold from its wax-based structure to a fully functional ceramic mold.
Methods for Removing Wax
You can use several methods to remove the wax from the mold. Each method has its own advantages, depending on the size and complexity of the casting. Here are the most common techniques:
-
Steam Autoclave: This method uses high-pressure steam to melt and drain the wax. Place the ceramic shell in an autoclave chamber, where the steam heats the wax until it liquefies. The melted wax flows out, leaving behind a clean and hollow mold. This technique is efficient and widely used in the industry.
-
Flash Dewaxing: In this method, you expose the mold to a high-temperature furnace. The intense heat instantly vaporizes the wax, leaving no residue. Flash dewaxing works well for molds with intricate details, as it minimizes the risk of damage to the ceramic shell.
-
Microwave Heating: This newer method uses microwave energy to heat and remove the wax. It offers precise control over the process and reduces energy consumption. However, it is less common due to the specialized equipment required.
Each method ensures that the wax is completely removed without compromising the integrity of the ceramic shell.
Preparing the Mold for Casting
After removing the wax, you must prepare the mold for the next stage of the process. This involves cleaning and inspecting the ceramic shell to ensure it is free of defects. Any cracks or imperfections in the shell can lead to issues during casting. Follow these steps to prepare the mold:
- Inspect the shell: Check for cracks, chips, or weak spots. Repair minor defects using ceramic patching material.
- Clean the cavity: Remove any remaining wax residue or debris. Use compressed air or a gentle brush to clean the interior.
- Strengthen the shell: Apply a final coating of refractory material if needed. This reinforces the shell and ensures it can withstand the molten metal.
Proper preparation of the mold is essential for achieving high-quality castings. By taking the time to inspect and clean the shell, you set the stage for a successful casting process.
Step 6: Pre-Heat the Mold
Why Pre-Heating is Necessary
Pre-heating the mold is a critical step in the investment casting process. It ensures that the ceramic shell reaches the right temperature before you pour molten metal into it. This step prevents thermal shock, which can crack or damage the mold. By pre-heating, you also reduce the risk of defects in the final casting. A properly heated mold allows the molten metal to flow smoothly, filling every cavity and capturing intricate details.
Pre-heating stabilizes the mold and prepares it to handle the extreme heat of molten metal without compromising its integrity.
Additionally, pre-heating helps remove any residual moisture from the ceramic shell. Moisture can cause steam explosions when it comes into contact with molten metal. Eliminating this risk ensures a safer and more efficient casting process. Pre-heating also maintains the temperature of the molten metal for longer, which is essential for achieving precise and high-quality results.
How the Mold is Pre-Heated
You can pre-heat the mold using a controlled furnace or kiln. The process involves gradually raising the temperature of the ceramic shell to the desired level. Follow these steps to pre-heat the mold effectively:
- Place the mold in the furnace: Position the ceramic shell carefully to avoid any stress or pressure on its structure.
- Set the temperature: Adjust the furnace to the required pre-heating temperature, typically between 1,000°F and 2,000°F, depending on the type of metal being cast.
- Heat gradually: Increase the temperature slowly to prevent sudden thermal expansion, which could weaken the shell.
- Monitor the process: Use temperature sensors or thermocouples to ensure consistent heating throughout the mold.
- Hold the temperature: Maintain the target temperature for a specific duration to ensure uniform heat distribution.
This gradual and controlled heating process prepares the mold for the next stage. It ensures that the ceramic shell can withstand the intense heat of the molten metal without cracking or deforming.
Ensuring Mold Integrity
Maintaining the integrity of the mold during pre-heating is essential for successful casting. You must inspect the ceramic shell before placing it in the furnace. Look for any visible cracks, chips, or weak spots. Repair minor defects using ceramic patching material to strengthen the shell. A thorough inspection reduces the risk of failure during the casting process.
During pre-heating, monitor the mold closely to detect any signs of stress or damage. Uneven heating can cause warping or fractures, so ensure that the furnace provides consistent heat. Avoid overheating, as excessive temperatures can weaken the ceramic material. By following these precautions, you preserve the mold's strength and reliability.
A well-prepared and pre-heated mold ensures that the molten metal flows evenly, resulting in a flawless final product.
Pre-heating is not just a preparatory step; it is a safeguard for the entire casting process. By taking the time to heat the mold correctly, you set the stage for producing high-quality and precise metal parts.
Step 7: Pour the Castings
Pouring Molten Metal into the Mold
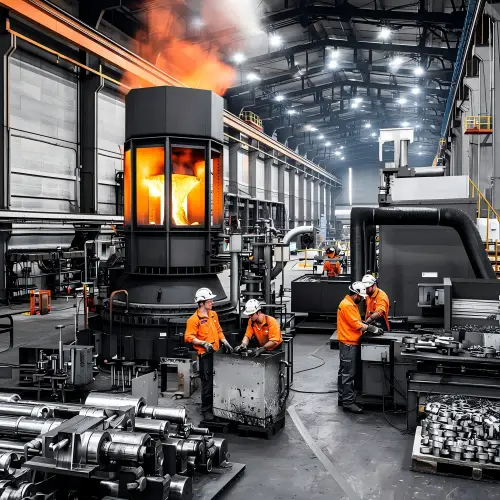
Pouring molten metal into the ceramic mold is one of the most critical steps in investment casting. You begin by heating the metal to its melting point in a specialized furnace. Once the metal reaches the desired temperature, you carefully transfer it to a pouring ladle. This ladle allows you to control the flow of the molten metal as you pour it into the pre-heated ceramic mold. The molten metal fills the hollow cavity left by the wax pattern, capturing every intricate detail of the design.
The pouring process requires precision and steady hands to ensure the metal flows evenly and completely fills the mold.
You must pour the metal at a consistent speed to avoid turbulence, which can introduce air bubbles or defects. The temperature of the molten metal and the mold must align to prevent issues like incomplete filling or cracks. By maintaining focus and precision during this step, you ensure the final casting meets the highest quality standards.
Controlling the Pouring Process
Controlling the pouring process is essential for achieving flawless castings. You need to monitor several factors to ensure success:
- Metal Temperature: Use a pyrometer to confirm the metal has reached the correct pouring temperature. Overheating can weaken the metal, while underheating may cause incomplete filling.
- Pouring Speed: Maintain a steady flow to prevent splashing or turbulence. Uneven pouring can lead to defects in the final product.
- Mold Positioning: Secure the mold in a stable position to avoid movement during pouring. Any shift can disrupt the flow of metal and compromise the casting's accuracy.
- Ventilation: Ensure proper venting in the mold to allow trapped air to escape. This prevents air pockets from forming in the casting.
By controlling these aspects, you minimize the risk of defects and produce high-quality castings. Attention to detail during pouring directly impacts the success of the entire investment casting process.
Importance of Precision in Casting
Precision during the pouring stage determines the quality and reliability of the final product. Every step, from heating the metal to filling the mold, requires accuracy and care. Even minor errors can result in defects like porosity, incomplete shapes, or weak spots in the casting.
Precision ensures that the molten metal flows smoothly, fills every cavity, and solidifies evenly.
Investment casting relies on this precision to create parts with intricate geometries and tight tolerances. Industries like aerospace and medical manufacturing demand components that meet exact specifications. By mastering the pouring process, you contribute to the production of durable and reliable metal parts.
Step 8: Clean the Castings
Removing the Ceramic Shell
After the metal has cooled and solidified, you need to remove the ceramic shell to reveal the casting. This step is essential for accessing the newly formed metal parts. The ceramic shell, which served as the mold, must be carefully broken away without damaging the casting underneath.
To remove the shell, follow these common methods:
- Mechanical Vibration: Use vibrating equipment to shake off the ceramic material. This method works well for breaking apart the shell without applying excessive force.
- High-Pressure Water Jet: Direct a powerful stream of water at the shell to wash it away. This technique is effective for removing stubborn ceramic layers while preserving the casting's surface.
- Manual Tools: For smaller or more delicate castings, use hand tools like chisels or hammers to gently chip away the ceramic shell.
Removing the shell requires precision and care to avoid damaging the intricate details of the casting. Take your time to ensure the process is thorough and controlled.
Once the ceramic shell is completely removed, you can proceed to clean the casting further to enhance its appearance and quality.
Cleaning and Inspecting the Castings
After removing the ceramic shell, you must clean the casting to eliminate any remaining debris or imperfections. This step ensures that the surface of the casting is smooth and ready for inspection.
Here’s how you can clean the casting effectively:
- Sandblasting: Use abrasive materials like sand or grit to clean the surface. This method removes any residual ceramic particles and smooths out rough areas.
- Chemical Cleaning: Submerge the casting in a chemical solution to dissolve any remaining residues. This technique is particularly useful for intricate designs with hard-to-reach areas.
- Polishing: Buff the surface of the casting to achieve a refined finish. Polishing enhances the appearance and prepares the part for final inspection.
Once the casting is clean, inspect it thoroughly to identify any defects or irregularities. Look for cracks, air pockets, or incomplete sections. Use tools like magnifying glasses or X-ray machines for detailed inspections. Identifying and addressing issues at this stage ensures the final product meets quality standards.
Ensuring Quality After Casting
Quality assurance is a vital part of the cleaning process. You must verify that the casting meets the required specifications and tolerances. This step guarantees that the final product is reliable and ready for its intended application.
To ensure quality, follow these steps:
- Dimensional Checks: Measure the casting to confirm it matches the original design. Use calipers, micrometers, or coordinate measuring machines (CMM) for precise measurements.
- Surface Inspection: Examine the surface for any visible flaws. Smooth and uniform surfaces indicate a successful casting process.
- Material Testing: Conduct tests like hardness testing or tensile strength analysis to verify the casting's durability and performance.
- Non-Destructive Testing (NDT): Use techniques like ultrasonic testing or dye penetrant inspection to detect internal defects without damaging the casting.
Ensuring quality at this stage prevents costly errors and rework later. It also builds confidence in the reliability of the final product.
By cleaning and inspecting the castings thoroughly, you uphold the high standards of investment casting. This step prepares the parts for finishing and ensures they are ready for use in demanding applications.
Step 9: Finish the Castings
Trimming and Polishing the Parts
Once the casting is clean, you need to trim and polish it to achieve the desired shape and finish. Trimming involves removing excess material, such as sprues, gates, or any metal remnants left from the casting process. You can use tools like saws, grinders, or cutting machines to carefully separate these unwanted sections without damaging the main part.
Polishing follows trimming to refine the surface of the casting. This step smooths out rough edges and enhances the appearance of the part. You can use abrasive tools, buffing wheels, or polishing compounds to achieve a uniform and polished finish. Polishing not only improves aesthetics but also prepares the part for further treatments or applications.
Trimming and polishing ensure that the casting meets the exact specifications and is free of imperfections.
Heat Treatment and Final Adjustments
Heat treatment is essential for enhancing the mechanical properties of the casting. This process strengthens the metal, improves its durability, and ensures it performs well under demanding conditions. You can use techniques like annealing, quenching, or tempering, depending on the type of metal and its intended use. Heat treatment also relieves internal stresses caused during the casting process, reducing the risk of cracks or deformation.
After heat treatment, you may need to make final adjustments to the casting. These adjustments include machining specific areas to meet tight tolerances or adding threads, holes, or other features required for assembly. Precision tools and equipment help you achieve these modifications with accuracy.
Heat treatment and adjustments transform the casting into a reliable and functional component ready for its application.
Delivering the Finished Product
The final step involves preparing the casting for delivery. Before shipping, you must conduct a thorough quality inspection to ensure the part meets all specifications and standards. This includes verifying dimensions, surface finish, and mechanical properties. Any defects or inconsistencies must be addressed before the product leaves your facility.
Once the inspection is complete, package the casting securely to protect it during transportation. Use appropriate materials, such as foam, bubble wrap, or custom packaging, to prevent damage. Label the package clearly with all necessary information, including part details and handling instructions.
Delivering a finished product that meets high-quality standards builds trust with your customers and reinforces the value of investment casting.
By following these steps, you ensure that the casting is not only functional but also ready to meet the expectations of its end users. Finishing the casting is the final touch that completes the investment casting process.
Investment casting offers a reliable way to produce high-quality metal parts with intricate designs. Each step, from creating wax patterns to finishing the castings, plays a vital role in ensuring precision and durability. You can rely on this process to meet the demands of industries like aerospace, automotive, and medical manufacturing. Its ability to deliver complex and consistent components makes it an essential method for modern production. By understanding its steps, you gain insight into how this process achieves exceptional results.
FAQ
What is investment casting used for?
Investment casting is ideal for creating complex and precise metal parts. You often see it used in industries like aerospace, automotive, and medical manufacturing. It works well for components requiring intricate details, tight tolerances, and high-quality finishes.
For example, turbine blades, surgical instruments, and automotive engine parts are commonly made using this process.
How does investment casting differ from other casting methods?
Investment casting stands out because of its ability to produce intricate designs with minimal material waste. Unlike sand casting or die casting, it uses a wax pattern and ceramic mold to achieve high precision. This method also allows you to work with a wide range of metals, including alloys that are difficult to cast using other techniques.
What materials can be used in investment casting?
You can use various metals and alloys in investment casting. Common options include stainless steel, aluminum, titanium, and cobalt-chrome alloys. The process accommodates both ferrous and non-ferrous metals, making it versatile for different applications.
The choice of material depends on the part's intended use, such as strength, corrosion resistance, or heat tolerance.
Is investment casting expensive?
Investment casting can be more expensive upfront due to the tooling and materials involved. However, it reduces costs in the long run by minimizing material waste and requiring less machining. For high-precision parts or large production runs, it often proves cost-effective.
How accurate is investment casting?
Investment casting delivers exceptional accuracy. You can achieve tolerances as tight as ±0.005 inches per inch. The process captures intricate details and smooth surfaces, reducing the need for additional finishing or machining.
Can investment casting handle large parts?
Investment casting is better suited for small to medium-sized parts. While it can produce larger components, the size is often limited by the capacity of the equipment and molds. For very large parts, other casting methods like sand casting may be more practical.
How long does the investment casting process take?
The timeline for investment casting process depends on the complexity of the part and the production volume.
What are the advantages of investment casting?
Investment casting offers several benefits:
- Precision: Achieves intricate designs and tight tolerances.
- Versatility: Works with a wide range of metals and alloys.
- Material Efficiency: Minimizes waste compared to other methods.
- Surface Finish: Produces smooth surfaces, reducing the need for machining.
- Complexity: Handles geometries that other methods cannot replicate.
Are there any limitations to investment casting?
While investment casting excels in many areas, it has some limitations. The process can be costly for small production runs. It may not be suitable for very large parts. Additionally, the lead time for creating tooling and molds can be longer compared to other methods.
How do I know if investment casting is right for my project?
To determine if investment casting suits your needs, consider the following:
- Complexity: Does your design require intricate details or tight tolerances?
- Material: Are you working with metals that are compatible with the process?
- Volume: Is your production run large enough to justify the initial costs?
- Application: Does your part need high precision, durability, or a smooth finish?
If you answer "yes" to these questions, investment casting could be the ideal choice for your project.