


Industry news


Essential Tips for Beginners in Brass Casting
Brass casting offers a unique and fulfilling way to create metal objects. This craft demands your focus on safety, proper tools, and effective techniques. You must handle molten brass with care due to its hazardous nature. The process becomes easier when you prepare thoroughly and follow best practices. With patience and attention to detail, you can transform raw brass into beautiful, functional pieces. Start small, stay consistent, and watch your skills grow over time.
Key Takeaways
- Prioritize safety by wearing essential gear like heat-resistant gloves, goggles, and face shields to protect against burns and toxic fumes.
- Ensure proper ventilation in your workspace to avoid harmful fumes from molten brass, safeguarding your health during The Casting Process.
- Start with small projects to build confidence and gradually tackle more complex designs as your skills improve.
- Use high-quality brass and reliable tools to enhance the quality of your casts and achieve better results.
- Clean your brass thoroughly before melting to prevent defects like discoloration and brittleness in your final product.
- Preheat your molds to prevent cracking and ensure a smoother flow of molten brass for better quality casts.
- Engage with the Brass Casting community through forums and tutorials to gain insights, tips, and support from experienced enthusiasts.
Safety First in Brass Casting
Understanding the Risks
Hazards of molten brass, including zinc fumes
Molten brass poses significant risks if not handled properly. When heated, brass releases zinc fumes, which can harm your respiratory system. Prolonged exposure may lead to serious health issues, such as metal fume fever. You must remain vigilant and avoid inhaling these toxic fumes during the casting process.
Importance of proper ventilation to avoid toxic byproducts
Proper ventilation is essential when working with molten brass. Without it, toxic byproducts like zinc oxide can accumulate in your workspace. Set up your casting area in a well-ventilated location or use an exhaust system to remove harmful fumes. This precaution protects your health and ensures a safer environment for brass casting.
Must-Have Safety Gear
Heat-resistant gloves, goggles, and face shields
Invest in high-quality safety gear to shield yourself from potential hazards. Heat-resistant gloves protect your hands from burns, while goggles safeguard your eyes from molten metal splashes. A face shield adds an extra layer of protection, covering your entire face against unexpected accidents.
Proper footwear and protective clothing
Wear sturdy, closed-toe footwear to protect your feet from spills. Opt for protective clothing made of non-flammable materials to minimize the risk of burns. Avoid synthetic fabrics, as they can melt and stick to your skin when exposed to high heat.
Safe Practices for Handling Materials
Storing brass safely and handling molten metal with care
Store your brass materials in a dry, secure location to prevent contamination. When handling molten brass, use tools like tongs and pouring ladles to maintain a safe distance. Always stay focused and avoid distractions to reduce the risk of accidents.
Avoiding overheating to prevent zinc boiling out
Overheating brass can cause the zinc to boil out, releasing more toxic fumes and weakening the metal's quality. Monitor the temperature closely and ensure it stays within the recommended range. Using a reliable thermometer helps you maintain control throughout the process.
Essential Tools and Materials for Brass Casting
Tools You’ll Need
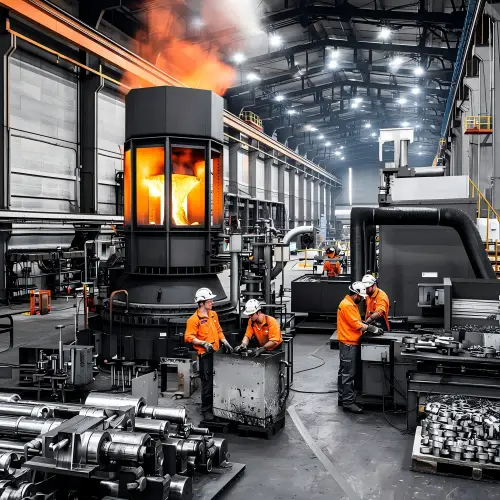
High-quality crucibles and furnaces
Using reliable crucibles and furnaces ensures a smooth brass casting process. Choose crucibles made from durable materials like graphite or silicon carbide. These materials withstand high temperatures and prevent cracking. Avoid homemade crucibles, as they often fail under intense heat. Select a furnace that reaches the required temperature for melting brass efficiently. A propane or electric furnace works well for beginners due to its ease of use and consistent performance.
Tongs, pouring tools, and sprues
Tongs and pouring tools are essential for handling molten brass safely. Use sturdy tongs with insulated grips to move the crucible without risking burns. Pouring tools, such as ladles, help you transfer molten brass into molds with precision. Sprues, which guide the flow of metal into the mold, must be appropriately sized. A properly designed sprue prevents solidification before the brass fills the mold completely.
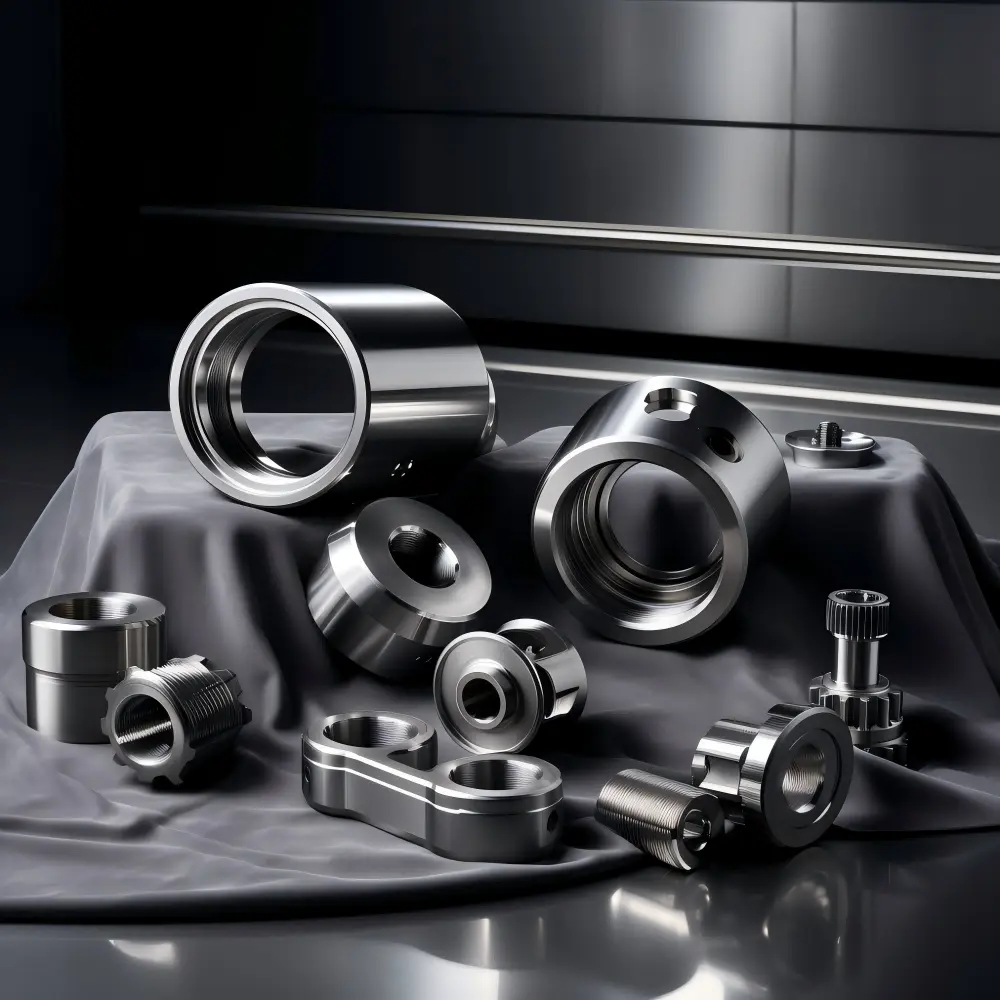
Molds for shaping your cast
Molds determine the final shape of your brass cast. Sand molds and investment molds are popular choices for beginners. Sand molds are reusable and easy to work with, while investment molds offer finer details for intricate designs. Ensure your molds are clean and preheated to avoid cracking or defects in the final product. Experiment with different mold types to find what suits your projects best.
Materials for Success
Clean brass scraps or ingots
Start with clean brass scraps or ingots to achieve high-quality results. Contaminated brass can lead to discoloration, brittleness, or other imperfections in your cast. Remove dirt, grease, or other impurities from the brass before melting it. This step ensures a smoother casting process and a more durable final product.
Flux for removing impurities
Flux plays a crucial role in removing impurities from molten brass. Add flux to the crucible during the melting process to separate unwanted materials from the metal. This step improves the quality of your brass and enhances the appearance of your finished cast. Use flux sparingly and follow the manufacturer’s instructions for the best results.
Sand or investment material for molds
Choose the right material for your molds based on your project’s requirements. Sand is affordable and versatile, making it ideal for beginners. Investment material, often made from plaster and silica, provides greater detail and precision. Prepare your mold material carefully to ensure it holds up during the casting process.
Setting Up Your Workspace
Organizing tools for efficiency and safety
Arrange your tools in a logical order to streamline your workflow. Keep tongs, pouring tools, and molds within easy reach. Store safety gear, such as gloves and goggles, in a designated spot for quick access. A well-organized workspace reduces the risk of accidents and helps you focus on the task at hand.
Ensuring a clean, well-ventilated environment
Maintain a clean workspace to prevent contamination of your materials. Remove clutter and debris that could interfere with your casting process. Ventilation is equally important. Set up your workspace in an open area or use an exhaust system to remove fumes. A clean and ventilated environment ensures both safety and better results in brass casting.
Step-by-Step Process for Brass Casting
Preparing Your Materials
Cleaning brass to avoid brittleness and discoloration
Start by cleaning your brass thoroughly. Dirt, grease, or other contaminants can weaken the metal and cause discoloration in the final product. Use a wire brush or sandpaper to remove surface impurities. For deeper cleaning, soak the brass in a solution of vinegar and salt, then rinse it with water. Dry the brass completely before proceeding. Clean materials ensure a stronger and more visually appealing cast.
Preheating molds to prevent cracking
Preheat your molds before pouring molten brass. Cold molds can crack when exposed to extreme heat, ruining your project. Place the molds near a heat source or inside a low-temperature oven to warm them gradually. Ensure the molds reach a consistent temperature to avoid thermal shock. Preheating also helps the molten brass flow evenly, improving the quality of your cast.
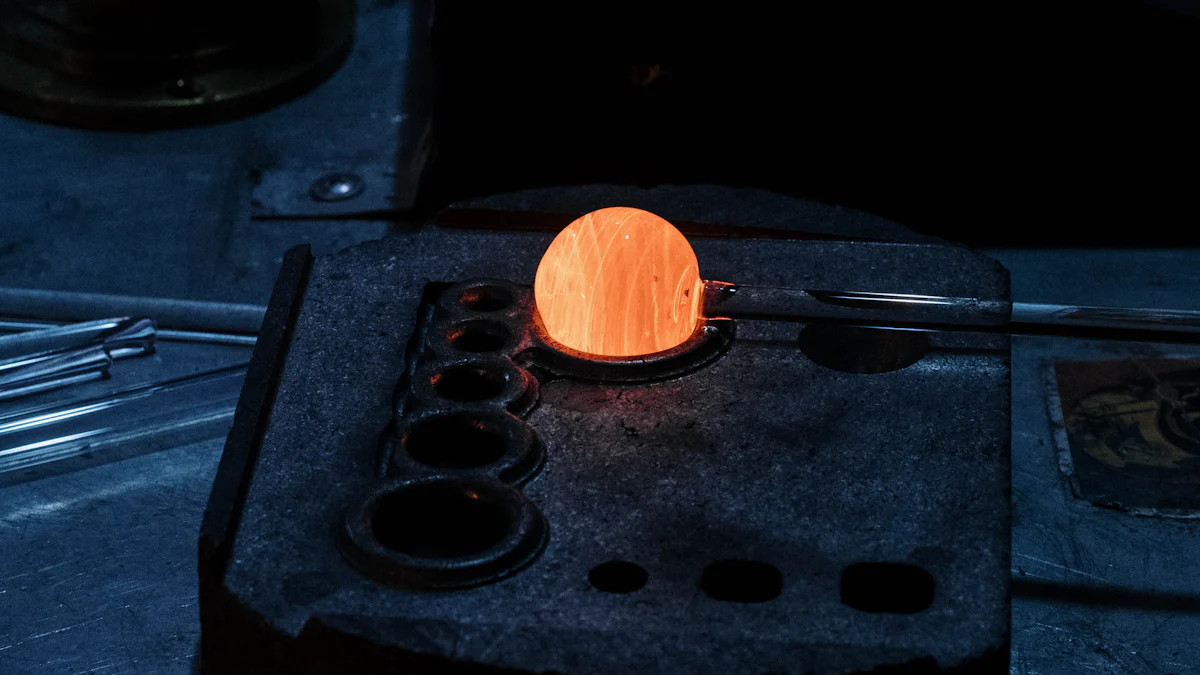
Melting and Pouring Brass
Ensuring the foundry reaches the correct operating temperature
Heat your foundry to the appropriate temperature for brass casting. Brass melts at around 1,700°F (927°C), but you should aim slightly higher to ensure smooth pouring. Use a reliable thermometer to monitor the temperature. Avoid overheating, as this can cause the zinc in the brass to boil out, releasing harmful fumes and weakening the metal. A properly heated foundry sets the stage for a successful casting process.
Pouring molten brass horizontally for even distribution
Pour the molten brass into the mold with care. Hold the crucible steady and pour the metal horizontally. This technique reduces pressure from the weight of the brass, ensuring even distribution throughout the mold. Pour slowly to avoid splashing and to allow the metal to fill intricate details. Precision during this step minimizes defects and enhances the final result.
Cooling and Finishing
Allowing the cast to cool completely before handling
Let the cast cool naturally before touching it. Rushing this step can lead to cracks or warping. Place the mold in a safe, undisturbed area and allow it to cool for several hours. The cooling process solidifies the brass and strengthens the structure. Patience here ensures a durable and well-formed cast.
Removing the cast from the mold and polishing it
Once the cast has cooled, carefully remove it from the mold. Use tools like pliers or a hammer to break away the mold material without damaging the cast. Inspect the piece for imperfections and use a file or sandpaper to smooth rough edges. Polish the surface with a buffing wheel or polishing compound to achieve a shiny, professional finish. Proper finishing enhances the appearance and usability of your brass creation.
Common Mistakes in Brass Casting and How to Avoid Them
Safety Mistakes
Skipping essential safety gear
Neglecting safety gear puts you at serious risk during brass casting. Molten brass can splash unexpectedly, causing burns or injuries. Always wear heat-resistant gloves to protect your hands and goggles to shield your eyes. A face shield provides full-face protection from molten metal splatters. Proper footwear and non-flammable clothing safeguard your body from accidental spills. Prioritize safety gear to create a secure working environment.
Neglecting proper ventilation
Failing to ensure proper ventilation exposes you to harmful fumes, especially zinc oxide released during the process. These fumes can cause respiratory issues and long-term health problems. Set up your workspace in an open area or install an exhaust system to remove toxic byproducts. Never work in enclosed spaces without adequate airflow. Protecting your lungs should always be a top priority.
Process Mistakes
Overheating or underheating brass
Incorrect temperatures can ruin your brass casting project. Overheating brass causes zinc to boil out, weakening the metal and releasing more toxic fumes. Underheating prevents the brass from flowing smoothly into the mold, leading to incomplete casts. Use a reliable thermometer to monitor the temperature. Aim for the recommended range to maintain the quality of your molten brass and achieve better results.
Using an improperly sized sprue
An incorrectly sized sprue disrupts the flow of molten brass into the mold. A sprue that is too small can cause the metal to solidify before filling the mold completely. On the other hand, an oversized sprue wastes material and increases cleanup time. Design your sprue carefully, ensuring it matches the size and complexity of your mold. This step ensures a smooth casting process and reduces material waste.
Preparation Mistakes
Casting with dirty or contaminated brass
Using dirty or contaminated brass leads to defects in your final product. Impurities can cause discoloration, brittleness, or structural weaknesses. Clean your brass thoroughly before melting it. Remove dirt, grease, or debris using a wire brush or a vinegar solution. Starting with clean materials ensures a stronger and more visually appealing cast.
Failing to preheat molds
Skipping the preheating step can cause molds to crack when exposed to molten brass. Cold molds create thermal shock, which ruins your project and wastes materials. Preheat your molds gradually using a low-temperature oven or a heat source. Warm molds allow the brass to flow evenly, improving the quality and durability of your cast. Always prepare your molds properly to avoid unnecessary setbacks.
Pro Tips for Success in Brass Casting
Refining Your Technique
Start with small projects to build confidence
Begin your brass casting journey with simple projects. Small items like keychains or basic shapes allow you to practice without feeling overwhelmed. These manageable tasks help you understand the process and build your confidence. As you complete each project, you’ll notice improvements in your skills and gain the courage to tackle more complex designs.
Experiment with different mold materials for variety
Explore various mold materials to expand your creative possibilities. Sand molds are great for beginners due to their affordability and ease of use. Investment molds, made from plaster and silica, offer intricate details for advanced designs. Trying different materials helps you discover what works best for your projects. This experimentation also enhances your understanding of how molds affect the final product.
Enhancing the Quality of Your Casts
Use high-quality brass and tools for better results
The quality of your materials and tools directly impacts your results. Always choose clean, high-quality brass to avoid defects like discoloration or brittleness. Invest in reliable tools, such as durable crucibles and precise pouring equipment. High-quality resources ensure smoother casting and a more polished final product. Avoid cutting corners, as better materials lead to better outcomes.
Incorporate proper finishing techniques for a polished look
Finishing techniques elevate the appearance of your brass creations. After removing the cast from the mold, inspect it for imperfections. Use files or sandpaper to smooth rough edges. Polishing compounds and buffing wheels add a professional shine to your work. Proper finishing not only improves aesthetics but also enhances the durability of your cast. Dedicate time to this step for a truly refined result.
Learning from the Community
Join brass casting forums and groups for advice
Engage with others who share your passion for brass casting. Online forums and social media groups provide valuable insights and support. Experienced members often share tips, troubleshoot issues, and recommend tools or techniques. Joining these communities connects you with a wealth of knowledge. You’ll also find encouragement and inspiration from fellow enthusiasts.
Watch tutorials and read guides to expand your knowledge
Educational resources like tutorials and guides help you refine your skills. Video tutorials demonstrate techniques step by step, making complex processes easier to understand. Written guides offer detailed explanations and tips for improving your craft. Regularly consuming these resources keeps you informed about new methods and trends. Continuous learning ensures steady growth in your brass casting abilities.
Brass casting offers a rewarding journey filled with creativity and learning. You develop patience and precision as you refine your skills. Focus on safety measures to protect yourself and ensure a smooth process. Invest in reliable tools and materials to achieve better results. Mistakes will happen, but each one teaches you something valuable. Begin with simple projects to build confidence and expand your abilities. Stay curious and explore new techniques to keep improving. Embrace the process, and enjoy transforming raw brass into unique, handcrafted pieces that reflect your dedication and artistry.