Crafting Bronze Sculptures from Clay
Bronze sculptures captivate with their timeless elegance and durability. I find the process of transforming clay into bronze fascinating. This journey involves a blend of art and science, where creativity meets precision. Bronze casting, a technique used for centuries, results in sophisticated and valuable pieces. These sculptures often become cherished investments, lasting for generations. The allure of bronze lies in its ability to capture intricate details, making each piece unique. As I delve into this craft, I appreciate the skill and dedication required to create such enduring art.
Historical Significance of Bronze Sculpture Making
Origins and Evolution
Bronze sculpture making has a rich history that dates back thousands of years. I find it fascinating how ancient civilizations, such as the Greeks and Romans, mastered this craft. They used the lost-wax method, a technique that remains popular today. This method allowed them to create detailed and intricate sculptures, capturing the essence of their subjects. During the Classical Antiquity and the Renaissance, artists refined their techniques, producing works that were both dynamic and dramatic. The Baroque period further pushed the boundaries of bronze sculpture, introducing more movement and emotion into the art form.
Cultural Impact and Notable Works
Bronze sculptures have left a lasting impact on cultures around the world. They often served as symbols of power, religion, and artistic achievement. I admire how these sculptures have stood the test of time, continuing to inspire and captivate audiences. Auguste Rodin, a renowned sculptor, marked the modern era of bronze sculpture with his innovative works. His pieces, such as "The Thinker," showcase the expressive potential of bronze, blending realism with emotion. These notable works highlight the enduring appeal of bronze sculpture, demonstrating its ability to convey complex human experiences and emotions.
Creating the Original Clay Sculpture
Selecting the Right Clay
Choosing the right clay is crucial for crafting a successful sculpture. I often start by considering the type of sculpture I want to create. Polymer clay is a popular choice due to its versatility. It remains soft and pliable until heated, making it ideal for detailed work. This clay doesn't dry out, which allows me to take my time perfecting the sculpture.
For larger pieces, I might opt for water-based clays. These clays are easy to shape when wet and become firm as they dry. Once the sculpture is complete, firing it in a kiln hardens the clay, resulting in a durable piece. However, I must work quickly with water-based clays to prevent them from drying out prematurely.
Sometimes, I use ball clay for its high plasticity. It requires mixing with other clays to prevent excessive shrinkage during drying and firing. This combination enhances its malleability, allowing me to achieve the desired form and detail.
Sculpting Techniques
Basic Tools and Methods
When sculpting, I rely on a set of basic tools to shape and refine the clay. A wire cutter helps me slice through large blocks of clay, while loop tools assist in removing excess material. I use modeling tools to smooth surfaces and define shapes. These tools come in various sizes and shapes, allowing me to work on both broad areas and intricate details.
I begin by sketching a rough outline of the sculpture. This step guides me as I build up the clay, ensuring the proportions are accurate. I often use my hands to mold the clay initially, feeling the form take shape under my fingers. This tactile approach helps me connect with the material and visualize the final piece.
Detailing and Texturing
Adding details and textures brings the sculpture to life. I use fine tools to carve intricate patterns and features. For example, a needle tool allows me to etch delicate lines, while a sponge can create subtle textures. I experiment with different techniques to achieve the desired effect, whether it's the smoothness of skin or the roughness of fabric.
To enhance fine details, I sometimes incorporate polymer clay. Its ability to hold intricate designs makes it perfect for adding embellishments. I can bake these details separately and attach them to the main sculpture later.
Throughout the process, I remain patient and attentive. Each step requires precision and care, ensuring the final sculpture reflects my artistic vision.
Making the Armature
Creating a bronze sculpture requires a strong foundation. I rely on an armature to provide this support. It acts as the skeleton of the sculpture, ensuring stability and structure throughout the sculpting process.
Purpose of an Armature
The armature serves several essential functions. It supports the weight of the clay, preventing sagging or collapsing. This is crucial, especially for larger sculptures. The armature also helps maintain the sculpture's shape as I work on it. It allows me to focus on details without worrying about structural integrity. Additionally, the armature provides a guide for proportions and poses, helping me achieve the desired form.
Materials and Construction
Choosing the Right Materials
Selecting the appropriate materials for an armature is vital. I often use wire, aluminum foil, and metal rods. These materials offer flexibility and strength. Wire, for instance, allows me to create intricate shapes and adjust them easily. Aluminum foil adds bulk without adding much weight. Metal rods provide rigidity, essential for supporting heavier clay.
Sometimes, I incorporate PVC pipes or wood for larger sculptures. These materials offer additional support and are easy to work with. Polymer clay can also strengthen wire armatures. By covering the wire and baking it, I create a solid base for the sculpture.
Building a Stable Structure
Constructing a stable armature involves careful planning. I start by sketching the sculpture's basic shape and dimensions. This helps me determine the armature's size and structure. I then twist and bend the wire to form the skeleton, ensuring it matches the sketch.
For added stability, I wrap aluminum foil around the wire. This creates a bulkier structure, reducing the amount of clay needed. I secure the armature to a base, such as a wooden board, to prevent movement during sculpting. This step ensures the sculpture remains steady as I work on it.
Throughout the process, I pay attention to balance and proportion. The armature must support the sculpture evenly, preventing any part from becoming too heavy. By building a stable structure, I set the foundation for a successful bronze sculpture.
Preparing the Clay for Molding
Finalizing the Clay Model
Finalizing the clay model is a crucial step in the bronze sculpture-making process. I ensure that every detail aligns with my artistic vision before moving forward. This stage involves refining the sculpture's form and ensuring all elements are in place. I carefully inspect the model, looking for any imperfections or areas that need adjustment. This meticulous attention to detail ensures that the final bronze piece will accurately reflect the original clay design.
I often use a variety of tools to perfect the clay model. Loop tools help me remove excess material, while fine-tipped instruments allow for precise detailing. I also rely on my hands to smooth surfaces and make subtle adjustments. This tactile approach helps me connect with the sculpture, ensuring it embodies the intended expression and emotion.
Surface Preparation Techniques
Surface preparation is essential for achieving a flawless mold. I focus on creating a smooth and even surface, free from blemishes or irregularities. This step is vital because any imperfections on the clay model will transfer to the mold and, ultimately, the bronze sculpture.
To prepare the surface, I use several techniques. Sanding the clay with fine-grit sandpaper helps eliminate rough patches and create a polished finish. I also apply a thin layer of water or slip—a mixture of clay and water—to fill in small cracks or gaps. This technique ensures a seamless surface, ready for molding.
In some cases, I incorporate modern materials like polymer clay to enhance the surface quality. Polymer clay's versatility allows me to add intricate details and textures that might be challenging with traditional clay. By baking these elements separately, I can attach them to the main sculpture, ensuring a cohesive and detailed design.
Throughout this process, I remain patient and attentive. Each step requires precision and care, ensuring the final sculpture reflects my artistic vision. By preparing the clay meticulously, I set the stage for a successful transition from clay to bronze.
Mold Making
Creating a mold is a pivotal step in the bronze Casting Process. It captures every detail of the clay model, ensuring the final bronze sculpture mirrors the original design. I find this stage both challenging and rewarding, as it requires precision and patience.
Types of Molds
Understanding the types of molds is essential for successful bronze casting. Each type serves a specific purpose and offers unique advantages.
One-Piece Molds
One-piece molds work well for simple designs without undercuts. I often use them for straightforward sculptures where the clay model can be easily removed. These molds are typically made from flexible materials like silicone rubber. This flexibility allows me to peel the mold away from the clay without damaging the sculpture. One-piece molds save time and resources, making them ideal for smaller projects.
Multi-Piece Molds
For more complex designs, I rely on multi-piece molds. These molds consist of several sections that fit together around the clay model. They accommodate intricate details and undercuts, which one-piece molds cannot handle. Creating a multi-piece mold involves dividing the clay model into manageable parts. I then construct each section separately, ensuring they align perfectly when assembled. This method requires more effort but allows for greater detail and accuracy in the final bronze piece.
The mold-making process involves several steps, each crucial for capturing the clay model's essence. I begin by preparing the clay sculpture, ensuring its surface is smooth and free from imperfections. This preparation prevents flaws from transferring to the mold.
The mold-making process involves several steps, each crucial for capturing the clay model's essence. I begin by preparing the clay sculpture, ensuring its surface is smooth and free from imperfections. This preparation prevents flaws from transferring to the mold.
-
Applying a Release Agent: Before creating the mold, I apply a release agent to the clay model. This substance prevents the mold material from sticking to the clay, allowing for easy removal later.
-
Building the Mold: I start by constructing a mold box around the clay model. This box contains the mold material, keeping it in place as it sets. For one-piece molds, I pour the mold material over the entire sculpture. For multi-piece molds, I work section by section, ensuring each part fits snugly against the others.
-
Curing the Mold: Once the mold material is applied, I allow it to cure. This process hardens the mold, making it durable enough to withstand the bronze casting process. Curing times vary depending on the material used, so I always follow the manufacturer's instructions.
-
Removing the Clay Model: After the mold cures, I carefully remove the clay model. For one-piece molds, I peel the mold away gently. For multi-piece molds, I disassemble the sections, taking care not to damage the mold or the clay model.
-
Inspecting the Mold: Finally, I inspect the mold for any defects or imperfections. Any issues must be addressed before proceeding to the next stage of bronze casting. A flawless mold ensures the final bronze sculpture will accurately reflect the original clay design.
Mold making is an art in itself, requiring skill and attention to detail. By mastering this process, I set the foundation for a successful bronze casting, bringing my artistic vision to life.
Wax Casting and Chasing
Creating the Wax Model
Creating the wax model marks a significant step in the bronze sculpture-making process. I begin by pouring molten wax into the mold, ensuring it coats the interior walls evenly. This technique involves pouring the wax in and out multiple times, typically about three coats, to achieve a consistent thickness of approximately 1/8 inch. This method results in a hollow wax replica of the original clay sculpture, maintaining the intricate details captured in the mold.
Working with wax offers a unique tactile experience. The warmth of my hands softens the wax, allowing me to mold and shape it with precision. This process reminds me of beeswax modeling, a craft that engages both children and adults in creating imaginative shapes. The wax's pliability enables me to refine the sculpture's form, enhancing details that might have been challenging to achieve in clay.
For smaller sculptures, I sometimes model directly in wax. This approach allows for maximum detail, as wax can capture even the most delicate features. I find this technique particularly rewarding, as it challenges my skills and creativity. The wax model serves as a crucial intermediary step, bridging the gap between the clay original and the final bronze piece.
Refining the Wax Model
Refining the wax model requires patience and attention to detail. I carefully inspect the wax replica, looking for any imperfections or areas that need adjustment. This stage involves smoothing surfaces, enhancing textures, and ensuring the model accurately reflects my artistic vision.
I use a variety of tools to refine the wax model. Carving tools help me remove excess wax and define intricate details. I also rely on my hands to mold and adjust the wax, ensuring a seamless finish. This tactile approach allows me to connect with the material, bringing the sculpture to life.
Wax carving, an ancient tradition in jewelry making, inspires my technique. This art form dates back 6,000 years, showcasing the enduring appeal of working with wax. By incorporating these traditional methods, I enhance the quality and detail of the wax model, setting the stage for a successful bronze casting.
Throughout this process, I remain focused and meticulous. Each step requires precision and care, ensuring the final bronze sculpture embodies the intended expression and emotion. By refining the wax model, I lay the groundwork for the next stages of bronze casting, bringing my artistic vision closer to reality.
Investment Casting
Preparing the Investment
Investment Casting begins with preparing the investment material, which is crucial for creating a precise mold. I start by selecting a high-quality investment powder, typically made from silica and gypsum. This combination ensures the mold can withstand the intense heat of molten bronze. I mix the powder with water to form a slurry, achieving a smooth consistency. This mixture will coat the wax model, capturing every detail.
I carefully pour the investment slurry over the wax model, ensuring it covers all surfaces evenly. This step requires patience and precision. Any air bubbles or gaps could compromise the mold's integrity. I gently tap the mold to release trapped air, ensuring a flawless finish. Once the investment sets, it forms a hard shell around the wax model, ready for the next stage.
Investment Process
The investment process involves several key steps to ensure the mold is ready for bronze casting. Each step requires attention to detail and careful execution.
-
Burnout: I place the invested wax model in a kiln. The heat melts the wax, leaving a hollow cavity within the investment. This step, known as burnout, is essential for creating space for the molten bronze. The kiln's temperature must be carefully controlled to ensure complete wax removal without damaging the investment.
-
Inspection: After burnout, I inspect the mold for any imperfections. I look for cracks or weak spots that could affect the casting process. A thorough inspection ensures the mold will produce a high-quality bronze sculpture.
-
Preheating: Before pouring the bronze, I preheat the mold. This step prevents thermal shock, which could cause the mold to crack. Preheating also ensures the bronze flows smoothly into the mold, capturing every detail of the original design.
Investment casting is a meticulous process that requires skill and precision. By mastering these steps, I ensure the final bronze sculpture reflects the original clay model's beauty and detail. This method, used for centuries, highlights the enduring appeal of investment casting as solid investments.
Bronze Pouring
Bronze pouring is a critical phase in the bronze casting process. It transforms the wax model into a durable bronze sculpture. This step requires precision and expertise to ensure the final piece reflects the artist's vision.
Melting the Bronze
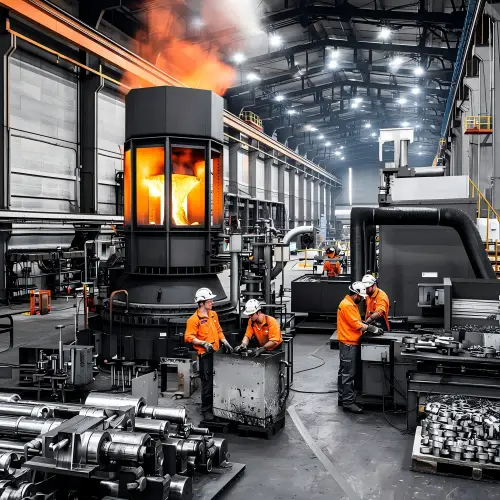
I begin by melting solid blocks of bronze. This process requires heating the bronze to approximately 2250 degrees Fahrenheit. The intense heat transforms the solid metal into a liquid state, ready for pouring. I find this stage fascinating as it combines art with science. The transformation from solid to liquid is a crucial part of bronze casting.
The molten bronze must be handled with care. Safety is paramount due to the high temperatures involved. I use specialized equipment to ensure the process is safe and efficient. The liquid bronze is then ready to be poured into the prepared mold.
Pouring Techniques
Pouring the bronze into the mold is a delicate task. I start by positioning the mold securely in a sand pit. This setup ensures stability during the pouring process. The mold, now a hollow ceramic shell, awaits the molten bronze.
-
Pouring the Bronze: I carefully pour the molten bronze into the mold's pouring cup. The bronze flows through the sprues, filling the cavities left by the melted wax. This step requires a steady hand and precise control to avoid spills or overflows.
-
Cooling the Bronze: Once the mold is full, I allow the bronze to cool. This cooling period is crucial as it solidifies the bronze, capturing the intricate details of the original design. The cooling process can take several hours, depending on the sculpture's size.
-
Breaking the Mold: After the bronze has cooled, I break the mold to reveal the sculpture. This moment is always exciting as it unveils the transformation from wax to bronze. The mold's remnants are carefully removed, leaving the bronze sculpture exposed.
Bronze pouring is a pivotal step in the bronze casting journey. It requires skill and attention to detail to ensure the final sculpture meets the artist's expectations. By mastering these techniques, I bring my artistic vision to life, creating a piece that will stand the test of time.
Metal Chasing and Finishing
Removing Imperfections
In the bronze casting process, removing imperfections is a crucial step. I begin by examining the bronze sculpture closely. Any flaws, such as seams or rough patches, need attention. These imperfections often result from the casting process, where molten bronze fills the mold. To address these issues, I use a variety of tools.
Chasing tools play a significant role in this stage. They help me smooth out the surface and refine the sculpture's details. The texture of the chasing tool transfers to the metal surface. Smooth-faced tools allow me to move the metal into shape effectively. For areas requiring more intricate work, I use tools with textured faces. These tools create different surface effects, enhancing the sculpture's overall appearance.
I also employ files and sandpaper to remove any remaining roughness. This step ensures the sculpture's surface is even and polished. By meticulously addressing each imperfection, I prepare the sculpture for the final finishing touches.
Polishing and Detailing
Polishing and detailing bring the bronze sculpture to life. After removing imperfections, I focus on achieving a smooth and shiny finish. This step enhances the sculpture's visual appeal and highlights its intricate details.
To polish the bronze, I use a series of abrasive materials. Starting with coarse grit, I gradually move to finer grits. This progression helps me achieve a mirror-like finish. Polishing compounds further enhance the shine, giving the sculpture a lustrous appearance.
Detailing involves refining the sculpture's features. I use small tools to emphasize textures and patterns. This stage allows me to add depth and dimension to the piece. By carefully working on each detail, I ensure the sculpture reflects my artistic vision.
The combination of polishing and detailing transforms the bronze sculpture. It captures light beautifully, showcasing the skill and artistry involved in bronze casting. This final step completes the journey from clay to bronze, resulting in a timeless work of art.
Patination
Understanding Patination
Patination fascinates me as it adds a unique character to bronze sculptures. This process involves altering the surface of the bronze to achieve different colors and textures. Ancient Asians mastered this art by burying their bronzes for years, allowing natural oxidation to create beautiful patinas. Today, I use more controlled methods to achieve similar effects.
Patina refers to the color and texture that develop on the bronze surface. It results from chemical reactions between the metal and its environment. These reactions can occur naturally over time or be accelerated through specific techniques. I find that patination not only enhances the sculpture's aesthetic appeal but also protects the bronze from corrosion.
Techniques for Applying Patina
Applying patina requires skill and precision. I use various techniques to achieve the desired effect, each offering unique results. Here are some methods I often employ:
-
Chemical Application: I apply acidic chemicals to the bronze surface to induce oxidation. This method allows me to control the color and texture of the patina. By adjusting the concentration and type of chemicals, I can achieve a range of hues, from deep greens to rich browns.
-
Heat Application: Heat plays a crucial role in patination. I use a torch to heat the bronze, enhancing the chemical reactions. This technique helps the patina adhere better to the surface, resulting in a more durable finish. The heat also allows me to create gradients and variations in color, adding depth to the sculpture.
-
Layering: I often layer different patinas to achieve complex effects. By applying multiple layers of chemicals and heat, I can create intricate patterns and textures. This method requires patience and experimentation, but the results are worth the effort.
-
Natural Methods: Sometimes, I let nature take its course. By exposing the bronze to the elements, I allow natural oxidation to occur. This method takes longer but produces unique and organic patinas. I find this approach particularly rewarding, as it connects the sculpture to its environment.
Patination transforms a bronze sculpture, adding depth and character. Each technique offers different possibilities, allowing me to express my artistic vision. By mastering these methods, I enhance the beauty and longevity of my bronze creations.
Final Assembly and Care
Assembling the Sculpture
Assembling the sculpture marks the culmination of the bronze casting journey. I begin by carefully aligning each piece of the sculpture. This step ensures that every part fits together seamlessly. I use welding techniques to join the sections, creating a cohesive and sturdy structure. Welding not only secures the pieces but also enhances the sculpture's overall strength.
After welding, I focus on blending the joints. I use metal files and sandpaper to smooth the welded areas. This process ensures that the seams are invisible, maintaining the sculpture's aesthetic integrity. I pay close attention to detail, ensuring that the final piece reflects my artistic vision.
Once the assembly is complete, I conduct a thorough inspection. I check for any imperfections or areas that need adjustment. This meticulous approach guarantees that the sculpture meets the highest standards of quality and craftsmanship.
Long-term Care and Maintenance
Proper care and maintenance are essential for preserving the beauty of a bronze sculpture. I recommend regular cleaning to prevent dust and dirt buildup. A soft cloth and mild soap work well for this task. Avoid using harsh chemicals, as they can damage the patina.
To protect the sculpture from environmental factors, I apply a thin layer of wax. This coating acts as a barrier against moisture and pollutants. I reapply the wax every few months to ensure continued protection.
For outdoor sculptures, I suggest periodic inspections. Check for signs of corrosion or weathering. If necessary, consult a professional conservator for restoration. Regular maintenance helps preserve the sculpture's appearance and extends its lifespan.
By following these care guidelines, I ensure that my bronze sculptures remain vibrant and enduring. This commitment to maintenance reflects my dedication to creating timeless works of art.
The journey from clay to bronze captivates me with its transformative power. Sculpting ignites creativity, allowing me to transform ideas into tangible art. This process, rich in history and technique, offers a unique blend of art and science. Bronze sculptures, with their universal appeal, stand the test of time. I encourage you to explore this craft, embracing the challenges and rewards it brings. Creating a bronze sculpture offers immense satisfaction and artistic fulfillment. It allows you to express your vision and leave a lasting legacy. Dive into this art form and discover the joy of bringing your imagination to life.
Ningbo Pingheng Machinery Co., Ltd (www.phcasting.com) is a bronze precision casting factory with many years of casting experience, please choose it!
See Also
Unlocking The Key To Successful Precision Casting
The Crafting Process Behind Tin Bronze Precision Castings
A Comprehensive Guide To Tin Bronze Castings
Comparing Tin Bronze With Other Bronze Alloys
Utilizing Tin Bronze Castings In Heat Exchanger Applications


